Monday, March 21, 2011

(Delicious) Power Bars.

power bars 4
power bars 3
Wow, my sister is really showing me up. But. Tonight I have a recipe that feels indulgent, but isn't. Do you already want to make it? Good. I thought so. These power bars are pathetically easy to make, require little effort (especially if you have a mom to chop the walnuts and almonds), and taste really, really good. Plus, you can eat them for breakfast for days. And sometimes you just don't feel like making breakfast. That's where these guys come in. And because I followed Heidi's recipe exactly, I'm simply going to link to it. Although you should make sure you have a lot of time because upon clicking on this link, you'll happen upon 101 Cookbooks (if you haven't already been there before) and then you'll spend hours (hours!) flipping through Heidi's archives proclaiming that you need 8 different kinds of flours and purging your pantry of white sugar. So, I warned you.
power bars 2
power bars 5


- The Florida Sister

Friday, March 18, 2011

Cinnamon Pull Apart Bread


Alright. This is NOT healthy (although I wish it was). For Mark's birthday I gave him a year of dates. Each month he opens up an envelope with that month's "date". This month it was any baked good of his choice. So I gave him 6 options (per his request) and this was his choice.

And it was a good choice. This stuff is seriously good. I'm pretty sure we would've eaten the whole loaf if we didn't have the good sense to stop before we entered a sugar induced coma. We did, however, eat half the loaf, but it was oh so worth it.

You can get the recipe here. The only change I made was that I used skim milk instead of whole milk. This stuff is good. You should probably make it right now.

P.S. I love Joy the Baker (the lovely maker of this recipe). Her blog is great.

Thursday, March 17, 2011

Carrot Pudding


Over the weekend I went to the library. I had accrued a $5 fine and had been avoiding going to the library so I wouldn't have to pay it, but I couldn't wait any longer! I wanted to check out Jane Eyre and read it before the movie comes out.

I, of course, had to go peruse the cooking/baking books. It's nice to check out cookbooks and page through them in the coziness of your own home. One of the books I checked out was the Moosewood Restaurant Book of Desserts. I have two Moosewood books and love them both, so I was quite excited to see a whole book devoted to desserts! This seems to be the perfect book to aid me in my new pursuit of healthy baking. I think I might have to purchase it.

Without further ado, carrot pudding:

Ingredients:
1 c peeled and chopped carrots
1 c water
1/2 c packed brown sugar **
2 Tbs lemon juice
1/4 tsp lemon zest
1 egg white
1/2 c flour
1 tsp baking powder
1 tsp cinnamon
1/4 tsp ginger
1/4 tsp nutmeg

Combine carrots and water in pan and cover. Simmer on medium-high heat for 6-8 minutes until tender. Cool the carrots and cooking liquid slightly (I put mine in a bowl and then put them in the freezer). They don't have to be super cool...just not boiling hot (which is bad for your food processor). Blend them up in a food processor or blender. Cool. (I put them back in the freezer for 5 minutes and they got plenty cool). While you're waiting you can preheat the oven to 350 and lightly butter, oil or spray your ramekins**. Also, boil some water (enough to fill a baking pan halfway).

Beat the carrot puree with the brown sugar, lemon juice, lemon peel, and egg white. Mix well. Combine the dry ingredients in a separate bowl then fold into the carrot mixture.

Divide the batter between the ramekins. Place the cups in a baking pan. Place the baking pan in the oven. Pull your rack out a little and then put in the boiling water (it should reach about halfway on your cups). Bake for 35 minutes, until a knife inserted in the center of a pudding comes out clean. Remove the cups from the pan and cool.

These are good, but not the best thing I've ever made or even in the top hundred. It was nice to eat them with a clear conscious. These have .3 grams of fat and include carrots! So I'm pretty sure this "dessert" is actually health food.

**I ran out of brown sugar so I made my own! I mixed 1 cup of white sugar with 1 tbs molasses and stirred them together with a fork. Then I packed my half cup for this recipe. I'm saving the leftover sugar for other recipes!

**I love ramekins. I use them for their true baking purpose only every couple of months. However, we use them all the time - to prep ingredients or to eat ice cream or yogurt in. It makes my daily yogurt eating that much more special.


Saturday, March 12, 2011

Delicious Muffins

Two posts in one day? Yup! Hopefully someone out there is still reading this blog.

These muffins are delicious. I got the recipe from La Tartine Gourmande, which is the first blog I ever started following with any sort of regularity. I love this blog. The pictures are gorgeous, the food is delicious, and I wish I could be friends with Bea (the writer) and her adorable daughter.

When I saw these muffins I knew I had to make them.

A. They looked amazing.
B. With their healthier flours, and less sugar/butter they fit the bill for my healthier baking regime.


Indredients:

1 cup millet flour (140 g)
1/2 cup hazlenut meal (50 g)
1/3 cup teff flour (40 g)
1/3 cup brown rice flour (40 g)
1/4 cup quinoa flakes (20 g)
3 tbs unsweetened cocoa powder
1 tsp baking powder
1/2 tsp baking soda
1/4 tsp salt
2 large eggs
1/3 cup sugar (80 g)
1/4 cup Turbinado sugar (30 g)
1 stick (1/2 cup) unsalted butter, melted and cooled slightly
1/3 cup lowfat or fatfree buttermilk
2 tsp vanilla
2 large bananas, mashed with a fork
black sesame seeds for sprinking

Preheat oven to 350. Line muffin tin with paper cups. (This recipe makes a dozen muffins.) Combine dry ingredients except for sugar.

Combine sugars and eggs and beat until light colored. Add buttermilk, vanilla, and butter. Stir until combined. Add mashed bananas. Stir some more.

Add dry ingredients. Don't overmix! Spoon batter into paper cups and then sprinkle sesame seeds on top. Bake for 20-25 min. They're done when you stick in a knife and it comes out clean!

The flours are a little pricey and can be kinda hard to find. Most health food stores will have some in bulk so you don't have to buy a bunch. I bought a bag of teff flour and though it cost a bit, it was well worth it. These are DELICIOUS! I couldn't find hazelnut flour so I made my own. I bought hazelnuts in bulk (already out of their shells), toasted them for 12 min in a 350 oven, and then after they'd cooled ground them up in a food processor. I was worried about them becoming a butter so I added a tablespoon of sugar (which I had read would help prevent this).

We enjoyed our muffins warm with a little butter and a big glas of milk!

Baking Addiction

Attention. Attention. Attention. I have a baking ADDICTION.

In the past 8 days I've made:

Buckeyes
Chocolate Cake
Eclairs
Pancakes
Muffins

To be fair. I gave away half the buckeyes, the cake was for a birthday, and I gave away all the eclairs except for one, which I split with my guy.

Anyways, I've decided since I know this addiction won't magically disappear that I need to make my baking a little healthier (by which I mean use less butter and more healthful ingredients).

Last week I bought some special flours to make the aforementioned muffins. This morning when a pancake craving hit, I decided to use some of them to make my pancakes slightly more "healthy".

Here's my recipe:

1/2 cup flour
1/4 cup hazelnut meal (I made my own by toasting the hazelnuts for 12 min in the oven and then grinding them up in a processor)
1/4 cup teff flour
1/2 tsp baking powder
1/4 tsp baking soda
3 Tbs sugar
1/4 tsp salt
1 1/8 cups lowfat or fat free buttermilk
1 large egg
1 tablespoons butter, melted

Combine dry ingredients. Mix in buttermilk, egg, and melted butter. Stir until just combined. The batter will be somewhat lumpy, but that's ok. Don't overmix!

Heat your pan to medium heat. Add some butter to prevent sticking. I used 1/4 cup to dish out the batter, which made 8 decently sized pancakes. Wait until they're golden brown on the bottom and then flip to the other side. We enjoyed these with some frozen blueberries and raspberries, which I cooked up in a little maple syrup on the stove. YUM!

Saturday, March 5, 2011

Yummy Yellow Cake with Chocolate Frosting

Alright. This is a baking blog. Not a political blog. But if you've been paying attention to the news at all you've probably seen something about all the protesting going on in Madison. I'm not going to get into the nitty gritty of it all, but it currently seems to be overwhelming life and my thoughts. It's something that I and my fiance care a lot about, and we're constantly out there fighting for the rights of public workers. This is tiring. Exhausting. So sometimes you need a day off to bake a cake. And though I don't need an excuse to bake a delicious, decadent, 5 sticks of butter requiring cake...a birthday begs and pleads for this type of cake. So without further ado...a delicious cake.


I found the recipe for this cake in the cookbook flour, a wonderful book full
of lots of yummy treats and great baking tips.

Cake:

1.5 c unsalted butter at room temp
2 c granulated sugar
3 eggs
3 egg yolks
1 tsp vanilla
3 c cake flour
1 tsp baking powder
.5 tsp baking soda
.5 tsp salt
1 c lowfat buttermilk

Preheat oven to 350 degrees. Butter and flour 2 8-inch round cake pans.

Cream together the butter and sugar for 3-4 min on medium speed(for a stand mixer) and 8-10 (for a handheld mixer). You want it to be really light and fluffy. In a small bowl whisk together eggs, yolks, and vanilla. Add it into the butter mixture and mix until incorporated. Scrape down sides and mix a little more.

Mix together dry ingredients in a separate bowl. Then on a low speed add 1/3 of the flour mixture. Pour in half the buttermilk. Mix. Add more another third of flour. Mix. Add the rest of the buttermilk. Mix. (Do not overmix! After each addition mix until just incorporated).

Fold in the rest of the flour. Then divvy out the batter between the two cake pans. Bake 40-50 min. I overcooked mine a little, so make sure to check before the full 40 mins is up (in case your oven runs hot like mine). You want a golden top and the cake should spring back when pressed in the middle with your finger. Cool the cakes completely on a wire rack.

Frosting:

12 oz semisweet choc chips
1 c heavy cream
1 c butter at room temp
1 c powdered sugar
1/4 tsp salt
1/2 tsp vanilla

Put the chocolate in a heatproof bowl. In a pan scald the cream over med-high heat (bubbles will start to form around the edge of the pan, but it won't be boiling). Pour the hot cream over the chocolate and let sit for a minute. Then whisk the chocolate and cream together until all the chocolate in melted and it's smooth. You can let this sit at room temp for 1-2 hours until cool. Or if you're impatient like me put it in the fridge for 30 min. Whisking every 10 min. (Make sure it's completely cool or else you'll melt your butter while making the frosting.)

Beat together the butter and sugar for 2 minutes until fluffy and smooth. Add the cooled chocolate and beat for another 2 minutes. Turn up the mixer to medium-high speed and beat for a minute. The frosting should become a lighter color and should be thick. If you are using a hand mixer you may need to increase the time.

Remove the cakes from their pans. I know a lot of cake makers at this point will cut their cakes so their level. However, I don't mind if my cakes are a little wonky. So if you're a perfectionist level your cake, etc. etc. If you're like me (without doing anything to the cake layers), put your first layer of cake on a plate, frost. Then put your second layer on. Frost the top and sides. I got a little fancy with the leftover frosting and did some decorating.

Eat with a big glass of milk. Yum!

Thursday, December 30, 2010

hot cocoa + some.

toasted mallows.
I should start by telling you that I don't like hot cocoa. I suppose I did, at one time, and then I think I drank way too much. But, I'm here to say that this stuff is good. Like, mega good. Like, turned a non-hot-cocoa-lover back into the believer I used to be. So, you might want to try it. The best thing about this stuff is that you can use your powdered Swiss Miss, your fancy Ghiradelli, or your somewhere-in-between hot cocoa. Any of it will work. You should make this right away, though. And toast some extra marshmallows because you may want them for later.
the goods.
Hot Cocoa + Some
Adapted from Real Simple

Serves 4

Ingredients
4 servings of the hot cocoa of your choice
8 marshmallows
3-5 tablespoons malted milk powder

Directions
1. Prepare the hot cocoa according to package instructions (we used Ovaltine). Add 3-5 tablespoons malted milk powder (the amount is really up to you).
2. While your hot cocoa is microwaving, simmering, etc., place 8 marshmallows on a cookie sheet and broil in the oven for 30 seconds.
3. Place the toasty marshmallows in the steamy cocoa, and enjoy.
4. Repeat. :)

-The Florida Sister

Saturday, December 18, 2010

crispy. salty. white chocolate. oatmeal. COOKIES.

lovely cookies.
Also known as Make-These-Today cookies.
And, White-Chocolate-Is-My-New-Friend cookies.

oatmeal cookies_2
Can I tell you a secret? I've never liked white chocolate. If it wasn't nestled inside of Jeffrey's Aunt's white chocolate macadamia nut cookies, then just forget it. But, let me tell you something, folks. White chocolate chips are not real white chocolate. I know. I was shocked, too. You've got to buy the baker's chocolate, or a white chocolate bar if you want the real deal. Thanks to Deb for, once again, opening my eyes to the things I've been missing. Well, once I read the recipe for these cookies, I had to have them right away. And, you know, I've never really believed people that told me that they prefer white chocolate to just regular chocolate (yes, those people are out there) and I still kind of don't, but maybe I can sorta-kinda see where they're coming from now. But don't push it.
parchment paper.
oatmeal cookies
Crispy, Salty, White Chocolate, Oatmeal Cookies
Adapted from Smitten Kitchen, who adapted them from Cook's Illustrated.

Ingredients

1 cup all-purpose flour (I think 1/2 all-purpose, 1/2 whole wheat would work here.)
3/4 teaspoon baking powder
1/2 teaspoon baking soda
1/4 teaspoon table salt
14 tablespoons (1 3/4 sticks) butter, unsalted & at room temperature
1 cup sugar
1/4 cup packed light brown sugar
1 large egg
1 teaspoon vanilla extract
2 1/2 cups old-fashioned oats (If you're not an oat lover, better make it just 2.)
6 ounces good quality white chocolate (I got the Baker's brand, which seemed high enough quality for me.)
Coarse sea salt (for sprinkling atop the cookies)

Directions

1.
Preheat the oven to 350 degrees. (Maybe you won't forget to do this step if it's in bold.) Line the baking sheet with parchment paper, or a Silpat (if you're cool and have one). Whisk flour, baking powder, baking soda, and table salt in a medium bowl. Set aside.

2. Beat butter and both types of sugars until they are light and fluffy. Scrape the bowl down with a rubber spatula. Beat in eggs and vanilla extract until incorporated. Scrape down your bowl. Gradually add the flour mixture (I added it in two batches) and incorporate well.

3. Divide dough into 24* equal portions, each about 2 tablespoons. Roll between palms into balls, then place on lined baking sheets about 2 1/2 inches apart. Using fingertips, gently press down each ball to about 3/4-inch thickness.

4. Sprinkle coarse sea salt on the top of each cookie.**

5. Bake until cookies are golden brown, about 13-16 minutes. Rotate baking sheet halfway through. Watch these babies like your life depends on it during the last few minutes. These things burned in a second, and I lost about 8 good cookies to black bottoms. Not fun.

6. Transfer to wire racks and cool.

* The original recipe suggests a yield of 24. I made them a little smaller and got 32. If you're planning on taking these somewhere, I suggest going with cookies that are slightly smaller so you'll get a few extra. If you're keeping them for yourself (Good choice!) then why not make some big ol' cookies and go with 24, right?

** Originally, the recipe calls for flaky sea salt. Tell me where to buy it and I'm there. However, I think coarse sea salt works just as well. But, if you happen to find flaky sea salt, you'll only need about 1 or 2 flakes per cookie.

Enjoy these, kay?
- The Florida Sister

P.S. About the weirdly foggy pictures, I kept noticing this while I was taking them, but since my camera was dying I just figured that was why I was having problems, and then I noticed there was a big, fat smudge on my lens. Oh well!

Monday, December 13, 2010

Sorry I'm a Liar/Ginger Snaps

Ok. Ok. I lied.

I did not post anything, when I promised I would.

Does this mean I haven't been baking? Of course not. I've been baking tons. I just haven't posted anything.

So, now I'm posting. When I look at blogs to get baking ideas I almost ALWAYS pick the ones with pictures. I have no pictures of these cookies, but I PROMISE they are delicious. I make these cookies more than any others for a few reasons:

1. They're easy.
2. They make a lot. (If you roll the balls small)
3. I LOVE GINGER.

So without further ado these ginger snaps are altered from this recipe.

Ingredients:

3/4 cup butter (softened to room temperature)
1 cup sugar (plus more for rolling the cookies in)
1 egg
1/4 cup molasses
2 cups flour
2 heaping tablespoons ginger
2 heaping teaspoons cinnamon
1/2 tsp salt
1/2 tsp baking soda

Preheat oven to 325 (I almost ALWAYS forget this step.)

Mix butter and sugar until light and fluffy. Add egg and molasses, mixing well. Combine all the dry ingredients and then add to creamed mixture making sure everything gets mixed in well. Make into small balls...and I mean small. I get about 72 cookies out of this recipe. Less than a tablespoon, maybe about the size of a medium-largish grape. You'll figure out what you like. I like them smaller because you can eat 4 cookies and not feel like a pig, also there's more to share! Roll the cookies in sugar. Place on cookie sheet and bake 8-12 minutes. 9 seems to be the perfect amount of time for my oven.

ENJOY! These are delicious with a cup of tea.

Wednesday, November 10, 2010

More posts soon

Oh hey sad little neglected blog. I'm sorry. I bake ALL THE TIME. Seriously...ALL THE TIME. Once, twice a week. 4 times this week (in honor of my b-day). I just never blog.

I'm going to change that. Tomorrow.

To be continued...

Thursday, September 2, 2010

Mint Chocolate Cupcakes

mint chocolate.
Hi! How are you? Sorry we have been out and about so much lately. But, I'm back, and I have a recipe to share with you. I do feel a little guilty about this one, though. Mostly because I just feel like it's not as spectacular as a lot of other recipes.

But, who knows. Maybe it will really strike your fancy, in which case I'll be so glad I shared.

A couple things about these cupcakes: One. I don't think the chocolate cupcake tasted very chocolatey at all. And, the frosting was almost too butter-y (Yeah. I didn't know it was possible either.). Regardless, they were still a treat. They required quite a bit of effort, but you'll probably be really pleased with the results. And, if you're not a complainer like I am right now, then you'll love them and want to eat the entire batch by yourself.
cute liners.
mini and giant.
Mint Chocolate Cupcakes
Adapted from Martha Stewart

Makes about 12 regular and 12 mini-sized cupcakes or 18 regular cupcakes

Ingredients
For the cupcakes:
1 1/2 cups all-purpose flour

3/4 cup unsweetened Dutch-process cocoa powder
1 1/2 cups sugar
1 1/2 teaspoons baking soda
3/4 teaspoons baking powder
3/4 teaspoons salt
2 large eggs
3/4 cup buttermilk*
3 tablespoons canola oil
3/4 cup warm water
1 1/2 teaspoons peppermint extract

For the frosting:
2 large eggs, separated
1/2 cup sugar
2/3 cup milk
1/3 teaspoon pure vanilla extract
2/3 cup coarsely chopped fresh mint leaves
1 pound (4 sticks) unsalted butter, room temperature
1/4 teaspoon peppermint extract

Directions
For the cupcakes:
1. Preheat oven to 350 degrees. Line standard muffin tins with paper liners. Whisk together flour, cocoa powder, sugar, baking soda, baking powder, and salt. Add eggs, buttermilk, oil, water, and peppermint extract, and beat with a mixer on low speed until smooth.

2. Divide batter among muffin cups, filling each 2/3 full. Bake, rotating tins halfway through, until a tester inserted in the center comes out clean, 20 to 25 minutes. Let cupcakes cool in tins on wire racks for 10 minutes. Transfer cupcakes to racks, and let cool. Undecorated cupcakes will keep, covered, for 1 day, or frozen for up to 2 months.


For the frosting:
1.
Whisk together yolks and 1/4 cup sugar with a mixer on high speed until pale and thickened, 2 to 3 minutes.


2.
Prepare an ice-water bath. Bring milk, vanilla, and mint leaves just to a boil in a medium saucepan. Remove from heat. Whisk about 1/3 of milk mixture into yolk mixture. Pour yolk mixture back into pan with remaining milk mixture, and whisk to combine. Place over medium heat, and cook, stirring constantly, until custard registers 185 degrees on an instant-read thermometer. Remove from heat; strain through a fine sieve into a bowl. Set bowl in ice-water bath, and stir until cool.

3. Beat butter with a mixer on medium-high speed until pale and fluffy. Add chilled custard to butter, and beat until incorporated.

4. Heat whites and remaining 1/4 cup sugar in a heatproof mixer bowl set over a pan of simmering water, whisking constantly by hand until mixture is warm to the touch and sugar has dissolved (the mixture should feel completely smooth when rubbed between your fingertips). Attach bowl to mixer fitted with whisk attachment. Starting on low, and gradually increasing to medium-high speed, whisk until stiff peaks form.


5. Add egg-white mixture to butter mixture, switch to paddle attachment, and beat on medium-high speed until smooth. Beat in peppermint extract. Use immediately, or cover and refrigerate for up to 3 days or freeze up to 3 months. (Before using, bring to room temperature, and beat on low speed until smooth.)

6. Spoon buttercream into a pastry bag fitted with a large, plain tip. Pipe small mounds on tops of cupcakes. Flatten mounds with an offset spatula, then top with chocolate-mint leaves.

* Making your own buttermilk is easy: Add one tablespoon of vinegar or lemon juice to one cup of milk. Let it sit until it clabbers, about ten minutes, and proceed to use it as you would store bought buttermilk!

- The Florida Sister

Wednesday, July 28, 2010

I promise that there will be a post (or two!) soon.

Gosh, busy-ness. Sometimes it really does get the best of you.

In the mean time — happy baking!

-The Florida Sister

Wednesday, June 16, 2010

Beating Buttercream

When I started making these cupcakes I had no idea it would become an epic battle between me and swiss meringue buttercream frosting. I saw the recipe in my Martha Stewart cupcake book and strawberries are my favorite ingredient of late since they're in season full swing, and come on who can resist that picture next to the recipe. The cupcake looks perfectly delicious! The batter was pretty simple and delicious. It wasn't until I got to the frosting that I started having some challenges.



My first batch of frosting (yes there was more than one) seemed like a disaster, which was pretty disheartening seeing as it took about 20 minutes to make (15 of which was spent whisking with an electric hand whisk). After I added the butter in it just kinda turned into a soupy mess, which seemed to have no hope of sticking on a cupcake. So i threw it out. I might not have made another batch, but my eternally optimistic and wonderfully supportive fiance, Mark, insisted I should try again and that he would help whisk.

I decided to do some internet research first and found with great delight that Deb of Smitten Kitchen had made this frosting and had THE SAME PROBLEM! She said the key is not to give up hope and to keep whisking after adding the butter.

So. Take two. This time I added salt to the eggs while heating ( I picked this up in another post about this frosting). The eggs stiffened much more quickly the second go round (thank goodness). It took about 10 minutes to reach this stage and then I proceeded on to adding the butter. Once again soup, but this time I knew to just keep going. After another 10 minutes my arm was getting sore. "Damn it Martha!" I thought. You and your perfect cupcakes of deliciousness. It can't be easy huh? And Mark had dozed off on the couch. I was all alone with my soupy frosting. 5 more minutes had passed and I was distracted trying to kill a fruit fly. I looked down and voila! It had changed from soupy terribleness to creamy wonderfullness! I was thrilled!!!!!! I proceeded to prepare a pastry bag with the frosting and after frosting them (which was so much fun!) I was rewarded with the cutest tastiest cupcakes ever.


The recipe! I made a half batch which made 12 dozen regular sized cupcakes and a dozen mini cupcakes. So I'll include the already cut in half measurements for that because who needs 34 of these delicious ever so tempting treats around.

Batter:

1 and a little less than 1/2 cup all-purpose flour
1/4 cup cake flour (not self-rising)
1/2 tablespoon baking powder
1/2 tsp salt
1 stick o' butter (room temperature)
1 + 2 tbs sugar
1 tsp vanilla
2 small eggs and 1 small egg white
1/2 cup milk
1 c finely chopped fresh strawberries (about 10)

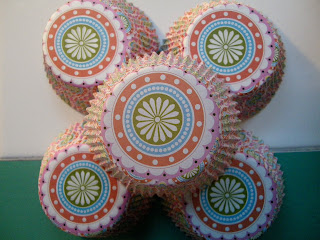
1. Preheat oven to 350. Line muffin tin with paper liners (I got THE cutest liners at Michael's pictured above...I couldn't resist. They were 1.99 for 75!). Sift together both flours, baking powder, and salt (I don't have a sift so I just fluff it with a fork).

2. With an electric mixer combine butter, sugar, and vanilla until smooth. Add eggs and white one at a time and beat until each is incorporated. Add flour in two batches, alternating with milk. Fold in chopped strawberries by hand.

3. Fill cups about 3/4 full. Bake, rotating tins halfway through, until a knife inserted in centers comes out clean. It took my cupcakes about 30 minutes and the mini ones 20. Cool on wire racks. Store in airtight containers.

The Ever So Challenging- Strawberry Meringue Buttercream:

3/4 c fresh strawberries chopped
2 egg whites
1 pinch o' salt
1/2 c + 2 Tbs sugar
1.5 sticks o' butter

1. Puree strawberries in food processor (I just used my blender). Combine egg whites, sugar, and pinch o' salt in heatproof bowl over a pan of simmering water. Whisk constantly until mixture is warm and sugar has dissolved (you should test this by rubbing the mixture between your fingers...if it's smooth it's good to go...this means your eggs have reached a safe temperature for consumption).

2. Whisk away until stiff peaks form (you need an electric whisker for this...for sure). This took me at least 10 minutes. The mixture should be pretty cool by this point.

3. Add butter one tablespoon at a time, and then whisk whisk whisk whisk whisk (once again...electric whisk is key). Don't lose heart after 10 minutes when nothing has changed. It took me 15 minutes after I'd added all the butter. I promise it will come together. After it has thickened and looks like frosting beat with a regular mixer for 2 minutes. Add strawberries and mix some more.

4. If you want to be fancy and fun fill a pastry bag and frost away. I used a star shaped tip that I got at Michaels. If you want to take the easy route you could just slather some on. It's delicious. You can store your frosting in the fridge for 3 days or the freezer for a month. Just bring to room temperature and mix before using again.

5. ENJOY! Share! Yum!

Thursday, June 3, 2010

granola.

granola, bananas, & bloobs.
sprinkled with cinnamon.
I love granola. Whether I put it in some yogurt or grab a handful right as I'm running out the door, it always tastes good. And it's super easy to make. I found this particular recipe over at Weelicious, a website that focuses on food for young families. I've already made two batches of this stuff. And I'm making a third right now. The first time I made this granola, I added the dried fruits that Catherine originally called for. While I think they taste delicious, I've now been making the granola without any fruit at all. I like doing it this way because then each person in the household can personalize it to their liking.
delish.

Classic Granola
Adapted from Weelicious

Makes 4 1/2 cups

2 cups Old Fashioned Oats
1/2 cup Almonds*
1/2 cup Cashews*
1/2 cup Sunflower Seeds*
2 tablespoons Wheat Germ
2-3 teaspoons Cinnamon (or, if you're like me, just pour it out until it looks like enough!)
1/3 cup Honey (I bet Maple Syrup would be a tasty replacement if you're out of honey)
1/3 cup Canola Oil

Directions
1. Preheat oven to 275ºF.
2. Combine all ingredients in a medium sized bowl, making sure to combine until entire mixture is evenly coated.
3. Pour mixture onto black baking sheet (if you choose to use silver, I'm willing to bet the baking time will be longer.) and evenly disperse over entire sheet.
4. Place granola in the oven and bake for 20 minutes.
5. Take the granola out and redistribute the mixture evenly over the sheet.
6. Place back in the oven for another 10 minutes, or until golden brown.**
7. Take the granola out of the oven and allow it to sit on the baking sheet for about 15 minutes so that it gets a little crunchier.
8. Store in a cool, dry place. Add your favorite dried fruit (cranberries, blueberries, apricots, raisins, cherries, mangoes, etc.)
• Will keep for about 1 week.

*The type of nuts you choose to use is entirely up to you. The batch I'm making now has 1/4 cup Pepitas and 1/4 Almonds instead of just the almonds. This recipe would also work well with walnuts or pecans.

**At this point, I would keep an extremely close eye on your granola. You might even want to set the timer at 5 minute increments. This stuff burns really quickly. Cashews can be your best friend. Keep an eye on them — as long as their tops aren't burning, then the rest of your granola is probably still okay. As soon as those tops look golden brown, take the granola out of the oven for good! Also, the mixture probably won't seem super crunchy right away. Give it time after baking, and I promise the crunch will come!

Hope you enjoy this tasty treat!

-The Florida Sister

Wednesday, May 26, 2010

Baking Splurge

When I went to the doctor and realized I'd gained 5 pounds I decided I should probably cut back on the sugar for awhile. I did relatively well for a few weeks, but then a strong desire to bake hit me and I had to indulge it.

So first indulgence:

I knew I wanted to make cookies. I bought chocolate chips at the grocery store because I needed to make cookies. Cookies are delicious. I knew I wanted to use oatmeal, nuts, and chocolate chips. So with a simple search on smitten kitchen I came up with this. Changes I made: I at least tripled the amount of cinnamon and doubled the amount of cloves and nutmeg. I am a firm believer that recipes never call for enough spices so I always increase the amount require. I used walnuts instead of pecans (because that's what I had). I think you could definitely decrease the sugar in this recipe a little bit. They were pretty sweet. I was doing this on my lunch break (once again) and completely forgot to take any pictures while baking. However, I promise you these are delicious. My fiance (calling him that makes me smile) said, "These are the most delicious cookies I've ever had!!" and proceeded to eat a dozen in one day.

Second indulgence::

I love the Farmer's Market and Madison just so happens to have an amazing one. The first few weeks of spring there was not a lot of fresh produce at the market, but something I saw over and over was rhubarb. So I decided I needed to experiment. I picked some up at the Tuesday night market (which is .1 miles from my apartment) and once again searched Smitten Kitchen for a recipe. There were a few options and I decided on this crumble. I made very few changes, only slightly increasing everything because I had closer to 3 cups of rhubarb. It was delicious, and disappeared VERY quickly.


~The Wisconsin Sister

P.S. The Florida Sister's carrot cupcakes were delicious. You should probably make some immediately.

carrot cupcakes.

in a row.
finely grated carrot friends.
Often times I like reasons to bake. I don't think I need a reason, but I feel better about baking something relatively unhealthy if there's a justifiable reason for eating it. Get it? So, when I learned that my sister would be coming home for a whirlwind trip I knew I needed to bake something. And it needed to be good. I'm a really, really big lover of Deb over at Smitten Kitchen. Like, really big. And when I saw these cupcakes I knew I needed to bake them. I cut the recipe in half because there's just no reason to have 24 cupcakes lying around taunting you.

12 is a much more manageable number.

Much more adult and grown up. And you know what else is grown up? Reducing the amount of sugar in the recipe, which is exactly what I did. Really, though. These taste totally fine by reducing the amount of sugar by 1/4 cup (in the actual cupcake, not the frosting).
yuuuum.
And, you know what else? These are delicious without any frosting at all. And since they're made with canola oil we mine as well be calling them health food, right? Right.

However, if you are going to frost these cupcakes (and I highly recommend you do. Just set a few naked ones aside for breakfast.) I suggest adding more maple syrup if you really want to taste it. If you just want a little hint, then follow this recipe to a tee. But, if you're like me, and you were looking for a little more maple syrup kick, I'd go ahead and add a few more glugs.

Enjoy these fresh out of the oven or the day after, or the day after that, or even the day after that. Really. These taste delicious days after being made.

Thursday, May 13, 2010

almond biscotti with a hint of orange.

biscotti.
There is nothing particularly intriguing about biscotti in my opinion. Generally, I think of it as having the consistency of a stale cookie and tasting like almond extract, a flavor I don't really enjoy. So, when I saw that Emily had made a batch of Deb's biscotti and she liked them, I figured I should try this recipe out asap. And I'm so glad I did. They were so delicious — buttery and crunchy, but the kind of crunch you imagine biscotti to have. I highly recommend making these. They aren't very hard to make and the results are so worth it. Oh, and I made these using freshly squeezed orange juice instead of the recommended liqueur. Still delicious.

Thursday, March 25, 2010

Lunch Break

If I eat lunch quickly and don't do much else I have time to bake on my lunch break. This is a wonderful thing. Today I decided to make cookies. I started out by following this recipe, but after realizing I didn't have some of the ingredients I started quite liberally changing it. Here is what I ended with:::

Chocolate Chip Peanut Butter Oatmeal Cookies!

1 1/4 c old fashioned oats
1/2 c whole wheat flour
1/2 tsp salt
1/2 tsp baking soda
1 1/2 tbs cinnamon
2 banana
2 tbs melted butter
6 oz dark chocolate chips
8 tbs peanut butter
1/4 c honey plus a little more

Preheat oven to 375

Mix the oats, flour, salt, baking soda and cinnamon in a large bowl. Mash bananas and butter in a separate bowl. I mushed them with my hands and then used a mixer. Mix the banana-butter blend into the dry ingredients. Add in peanut butter, mix, then the chocolate chips. Add the honey. I wanted it a little sweeter so I added extra honey. Scoop out small clumps onto a cookie sheet. It is really sticky, but don't worry. Keep it together as best as you can. Bake 10-15 minutes.

ENJOY!